Showing posts with label Recipes: Pie. Show all posts

Monday, November 7

Fabulous Apple Pie


1 recipe of your favorite 9 inch double pie crust

1/2 cup unsalted butter
3 tablespoons all-purpose flour
1/4 cup water
1/2 cup white sugar
1/2 cup packed brown sugar
1 tsp cinnamon
8 Apples - peeled, cored and sliced

Preheat oven to 375°F.

Put prepared apples in a microwavable bowl, cover with plastic wrap and microwave on high for 5 minutes. This blanches the apples and allows for a softer pie.

Mix apples with cinnamon and set aside.

Melt the butter in a saucepan. Stir in flour to form a paste. Add water, white sugar and brown sugar, and bring to a boil. Reduce temperature and let simmer.

Place the bottom crust in your pan. Fill with apples, mounded slightly. Cover with a lattice work crust.

Gently pour the sugar and butter liquid over the crust. Pour slowly so that it does not run off.

Bake for about an hour in the preheated oven, until golden brown. Don't forget to put a cookie sheet or something under the pie to catch the juice when it bubbles over!

Peach Pie

With all the peaches we got this year we have been trying different things. I tried a peach pie and I really liked this one I adapted from here.

Sorry about the little finger hole in the right and the misplaced shapes on top, but what do you do with a 3 year old when they are bound and determined to try something...

Pie Crust Recipe

For 2 crust pie:
2 cup all purpose flour
½ tsp. salt
¾ cup shortening
2/3 cup ice cold water
Sift flour and salt together. Cut in shortening with a fork until crumbly. Sprinkle water slowly into mixture. Combine ingredients with hands; working quickly to form a ball. Divide into 2 parts, trying not to handle it too much. With floured hands, turn onto floured surface and roll into a circle, approximately 14” diameter. With a knife, cut decorative slits in the top crust. Fold crusts into ¼’s to easily transfer to pie pans.

Peach Pie

9 peaches – peeled and thinly sliced
1 ½ cup sugar
1 tsp cinnamon
½ - ¾ tsp nutmeg
1/8 tsp salt
1 tsp. vanilla
3 Tbsp. flour
2 Tbsp butter
Fold above ingredients together and pour into 9” pie shell. Divide the 2 Tbsp. butter into small pieces and place on top of filling. Cut steam slits in top crust and place over filling. Crimp edges. Brush milk on outside of top crust, then sprinkle with sugar and cinnamon.
Bake at 400°F for 15 minutes; then turn oven down to 350°F and bake for another 30 – 40 minutes until golden.

Wednesday, December 2

Apple Pie

2 qrts bottled apples
1/2 to 3/4 Cup sugar
1 1/2 Tbs cornstarch
3/4 tsp cinnamon
1/4 tsp ground ginger

prepared Pie crust

for streusel top:
1 Cup flour
1/2 Cup brown sugar
1/2 tsp cinnamon
6 Tbs firm butter or margarine
1/2 cup chopped nuts (opt.)

1. Drain apples in strainer in sink.

If streusel top pie, if double crust skip to step 3
2. In bowl mix together flour, b. sugar, & cinnamon, cut in butter/margarine. Add nuts if desired.

3. Put apples in bowl with sugar, cornstarch, cinnamon and ginger. Mix well.

4. Pour into prepared pie crust. (I like to put foil around outer edges of crust to protect from over browning.) Top with another crust, make slits to vent; or use streusel topping, lightly sprinkle on top.

5. Bake double crust at 425 for 50 to 60 minutes, and streusel top at 375 for 55 to 60 minutes.
Bake until filling is bubbly. Let cool for about 45 minutes before cutting.

We did make the streusel top for Thanksgiving this year, but I was so tired, after making pies all day, I didn't take any pics. They were very yummy, especially topped with vanilla ice cream!!

Tuesday, November 24

No Fail Pie Crust

I was trying to get ahead for tomorrow and started my pies tonight. Well, my crust anyway, so I thought I would try to get this up quickly in hopes of maybe someone might be able to use it for this weekend.

You really can't mess this crust up, and it's delicious!

3 cups flour
1 tsp salt
1 1/2 cups shortening (I use butter flavor Crisco)
1/2 cup sugar
1 egg
1/4 cup cold water
1/2 tsp baking powder
1 Tbs white vinegar


1. Combine flour, salt & shortening in bowl and mix with a pastry cutter. If you don't have one use two butter knives and cut through it instead of using the back of a fork. For some reason it does make a difference.

2. Add sugar and mix again.

3. In separate bowl, combine remaining ingredients. It will foam and froth. Add to dry ingredients.
Mix well. I use my hands at this point, it will seem very sticky, way too sticky.
Just keep kneading with your hand until it starts to come together and clean up the bowl.


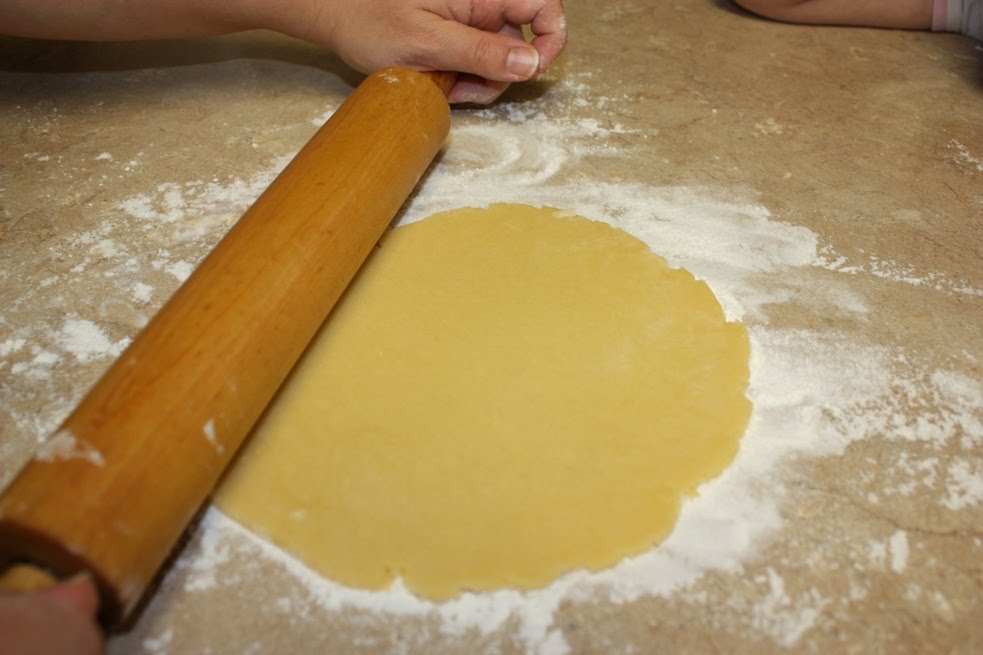
4. Pull about a softball size of dough and flatten in plenty of flour.


Roll out, using your pie tin as a reference to how big you need to roll it.
I like to roll mine pretty thin, but you do it to your desired thickness.


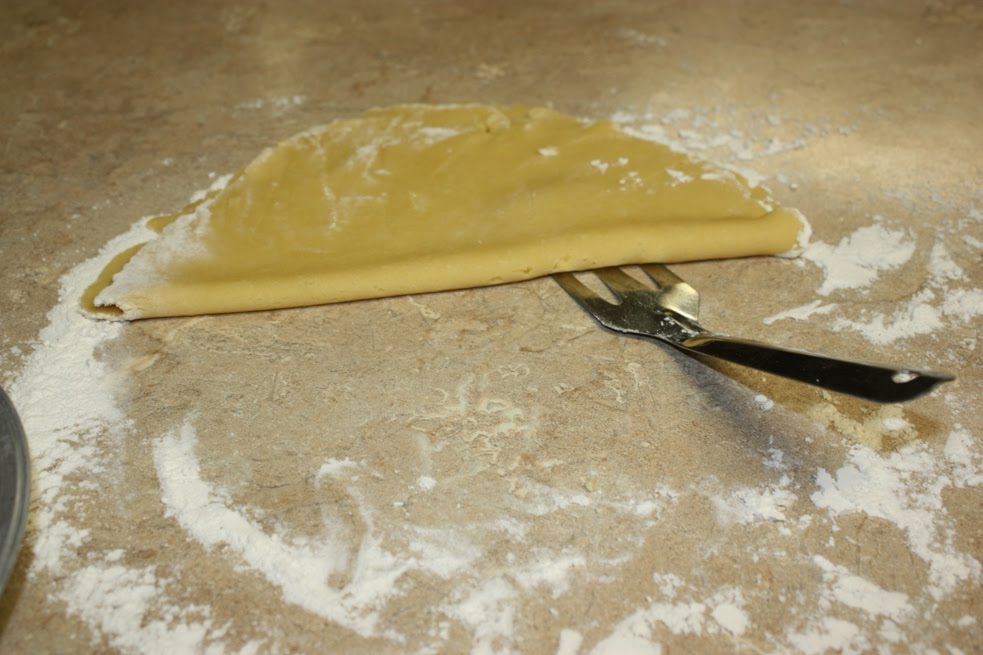
5. I use a spatula to loosen the crust from the counter, fold in half, use spatula again to loosen.


6. Put crust in pie tin to half way and unfold, don't worry if it falls apart as you are putting it in, just piece it back. This crust is very forgiving.


7. Lift the edges as you ease it into the bottom corners of the tin.


8. Use knife to cut to the edge or flute the edge as desired.


9. Using a fork, poke holes all over, be careful to poke through most of the crust so it won't bubble, but try not to go all the way to the tin. It won't ruin the crust, but your filling will seep underneath. Remember you can't ruin it, just suggestions to make it better!


10. Bake only for cream pies at 350 degrees until done, otherwise add filling and bake.


I like to take foil and wrap around the very edges to protect from getting over cooked.
I also like to make extra to freeze for later for quick and easy pies. Just put a layer of wax paper between and put in gallon size freezer zip lock bags and freeze.
We're making our pies tomorrow, I'll try to remember to post those pics quickly, in case you need to see! I'll also let you know our final pie count for this year, it's usually ridiculous!!
Happy Pie Making!!
PS This program has a mind of it's own, I tried to fix the words and pics just right, but the program wants it this way! Hope you can follow it!! :)

Saturday, February 28

Pie Crust Tips and Recipe

Warning: Picture Intensive!

I use to hate making pie crust. It was always so difficult to work with. I found out later why. My crust was always too dry. So here is some tips that makes it really easy and fun to make pie crust.
(Pie is one of my favorite desserts and that is why I never gave up)

You can use these tips with any recipe, but I am sharing the one I use the most and that is in the Betty Crocker cookbook from 1971.

8 or 9 inch one crust pie

1 cup allpurpose flour
1/2 tsp salt
1/3 cup plus 1 Tbsp shortening (only 1/3 cup if using lard)
2 to 3 Tbsp cold water (I use ice water and I use 1/4 to 1/3 cup)

Mix the flour and salt and then add your shortening. I like to use a little plastic wrap in the measuring cup because it saves on dishes.

I also like it because almost all of the shortening ends up in the bowl.

I really dislike wasting food.

Beautiful! Now cut in the shortening.

I like it when it is a little smaller, like pea size. You can do bigger pieces if you like flakier crust.

Here is the most important part. Poor in enough ice water that your dough is wet and sticky. Don't make it mush, but it needs to be fairly moist.

Mix it with your hand just until it is all wet. You want the shortening pieces to stay together as much as possible.

I got mine a little wet, but that is alright. It's better if it is a little too wet then not wet enough.

Wrap it in a ball in plastic wrap and place in the fridge for at least 20 minutes. This will help the shortening harden and make the wet dough easier to work with.

The flakier the crust the larger the shortening veins are when rolling it out.

Part II: Pie Crust

I like to roll out the dough on a large plastic board. This helps me not to get the beautiful lines that the tile leaves on the dough, and it cleans up quickly.

Keep a little pile of flour off to the side so you can get to it easily while you are rolling out the dough.

Turn your dough and add flour as you go so your dough doesn't stick to the board. With mine being a little wet the extra flour was a must.

Roll until you have about 2 or 3 inches to spare around the pie plate when you hold it up to it.

Fold the dough in half. With enough flour it will not stick to itself.

Then in half again to get quarters.

Place it in the pie plate and unfold. It is so much easier to transport this way.

Remember when doing a top crust, cut slits in it before you place it on top of the pie. It is easiest when the dough is folded into quarters. It's like making paper snowflakes! ;)

Play with it a little and make sure it fits into the pan without stretching anywhere.

Cut around the edge so you have about 1/2 an inch of extra.

This part is a lot easier if you do it before you put in the filling. I forget why I did it this way but I thought I had a good reason. After I ended up with a bunch of cherry pie filling on my fingers I realized it wasn't a good enough one.

Anyway, fold the pie crust under itself and you get a great thick edge to make beautiful designs.

I usually pinch mine and that is what I did with this one. I also used a cookie cutter to cut out the hearts.

Put a little milk on the hearts to keep them from burning. I like to sprinkle them with a little sugar after, but it's up to you.

Here is the finished pie cooked at 375 for 10 minutes and reduced to 325 for about 40 minutes.

I don't always go by the time. I go more by smell when I cook. It is really hard to explain how to do that so I say go by the time and look.

For left over crust: Roll it out and place it in a pan or on a cookie sheet and sprinkle with cinnamon sugar. It is wonderful.